Promoted articles
Epson Printer Network Troubleshooting & Wifi Setup
This guide will assist you on how to be able to configure your Epson printers to set as either Static IP or even enable your Epson Printer to work on Wi-Fi (Wi-Fi Dongle is required.)
Pre-requisites:
1) A computer or Laptop
2) EpsonNet Config Application
Note: Make sure your laptop is connected to the same Wi-fi network the printer is connected on. If your printer is showing an IP address of 192.168.192.168 or not appearing in the list, you may need to connect the printer directly to your laptop using an ethernet cable.
How to apply Static (or automatic) IP address for your printer:
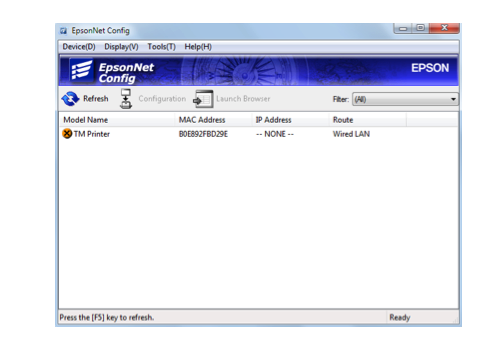
1. Launch EpsonNet Config
2. Please wait a few moments whilst EpsonNet picks up your printer. If the printer does not appear, ensure your printer is on and the ethernet cable is plugged into the router correctly and click “Refresh"

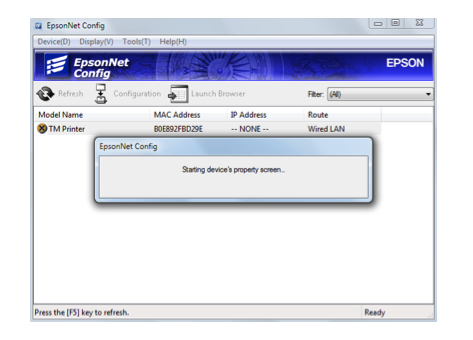
3. Once EpsonNet picks up your printer, click on the device (highlighting the device) and then navigate to and click on Configuration.

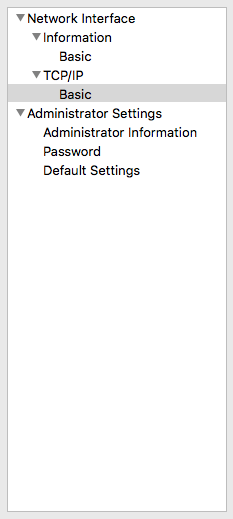
4. On the left of your screen, navigate to TCP/IP and click on "Basic".

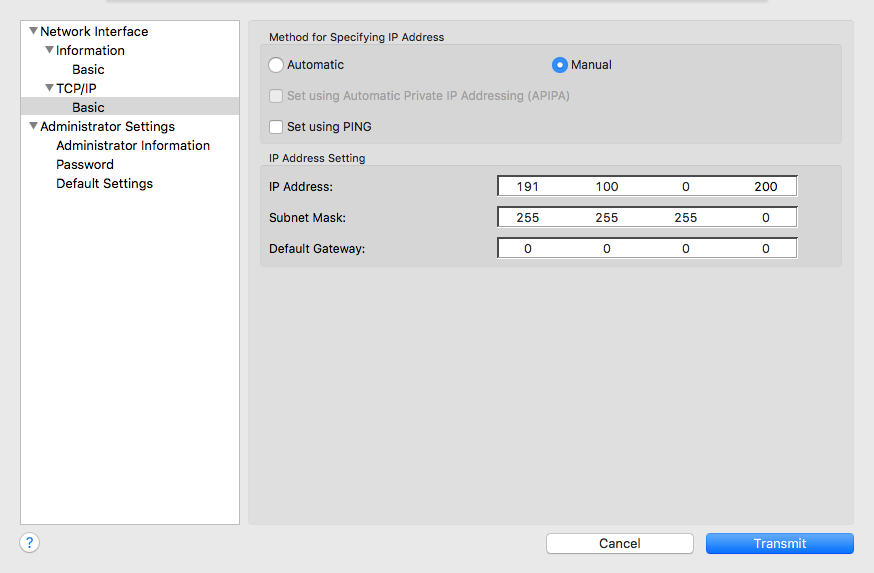
5. On the right hand side of the screen click on “Manual”.

6. In the box marked “IP Address” enter your IP address and follow that by clicking on "Transmit" on the bottom of the page.
How to get the correct IP address to use:
IP address: Set an IP address of your own.
Note: Easiest way to get the correct IP address is to:
- Go to cashier > Home > Diagnostics > Scroll down to the IP address
- Copy the AAA, BBB, and CCC of the IP address (AAA.BBB.CCC.DDD)
- Use any number between 2-150 for DDD that is not used by any other device.
Subnet mask: 255.255.255.0
Default Gateway: Copy the AAA.BBB.CCC part from the IP address and for DDD just put 1 (ie: 192.168.100.1)

7. The settings will be transmitted to your Printer. Once the screen reaches 100% click OK
How to set up your Epson to work with Wi-Fi:
Pre-requisite:
- A Wi-Fi compatible Epson printer
- Epson Wi-Fi USB Dongle
There are two methods to connect your printer via Wi-Fi:
Method 1:
1. Make sure the Wi-Fi USB dongle is connected to the printer and connect your printer to your router via wire ethernet cable.
2. Fetch the current IP address from the printer (please see articles in our help center based on your Epson model)
3. From your iPad/mobile phone (that is connected to the same router) open Safari/Chrome.
4. Type in the IP address in the URL bar
5. Log in with the username epson and the password epson.
6. Go to Wireless and fill in the following:
SSID: The name of your Wi-Fi when you search for it
Security level: WPA-PSK(AES)
WPA Pre-Shared key: Your Wi-Fi Password
7. Press Send
Method 2:
1. Make sure the Wi-Fi USB dongle is connected to the printer and connect your printer to your router via wire ethernet cable.
2. From your laptop/Computer launch EpsonNet Config
3. Select your printer -> Configuration
3. Go to Network > Wireless (or WLAN)
4. Fill in the following:
SSID: The name of your Wi-Fi when you search for it
Security level: WPA-PSK(AES)
PSK (Pre-shared Key): Your Wi-Fi Password
